As an Amazon Associate I earn from qualifying purchases.
TRONXY CRUX1 3D Printer Overview
95% Pre-installed
What an infuriating marketing ploy to say it’s “95% pre-installed”! Despite their claims of being a quick assembly printer, don’t you be fooled. Users have had to correct issues with the provided components before getting started. At least tightening belts and ensuring components are properly secured is the extent of the required adjustments.
Cantilever Structure
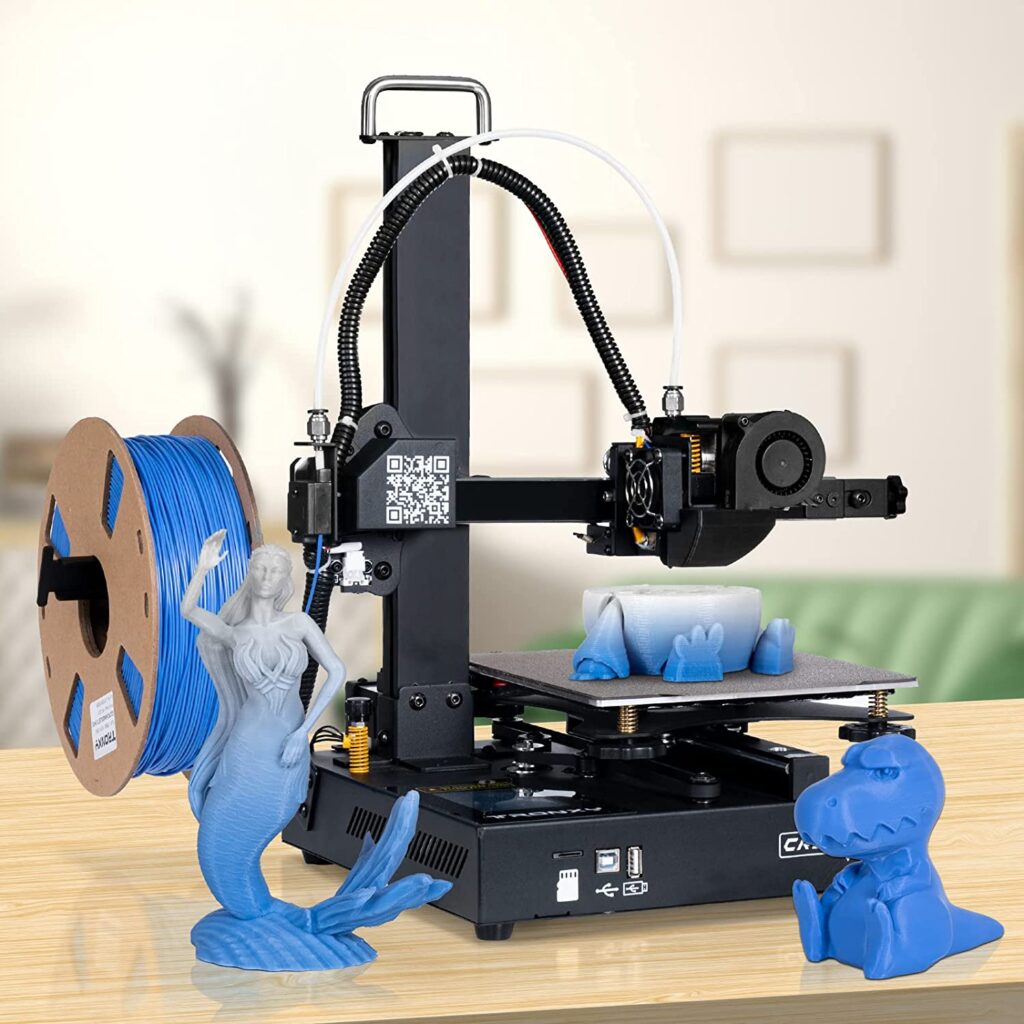
Well, look at that! A cantilever structure – because who needs a sturdy, well-built printer anyway? Though the design claim to improve efficiency and stability, it might leave you questioning if this will impact the quality of your prints in any way.
Portable and Lightweight
The CRUX1 3D printer weighs less than 6 kg, making it perfect for students looking to save their back from carrying a heavy printer! For young people wanting to explore technology and create their own toys, the portability aspect could be a nice selling point. What good is a printer if you can’t bring it to show and tell?
XYZ Axis Unique Design
The unique design of the XYZ axis is one of the redeeming factors of this printer, with users praising its easy belt adjustments and overall accuracy. However, don’t expect it to be perfect out of the box. Users reported having to tighten loose bolts and the Y-axis motor before getting started.
Direct-Drive Extruder
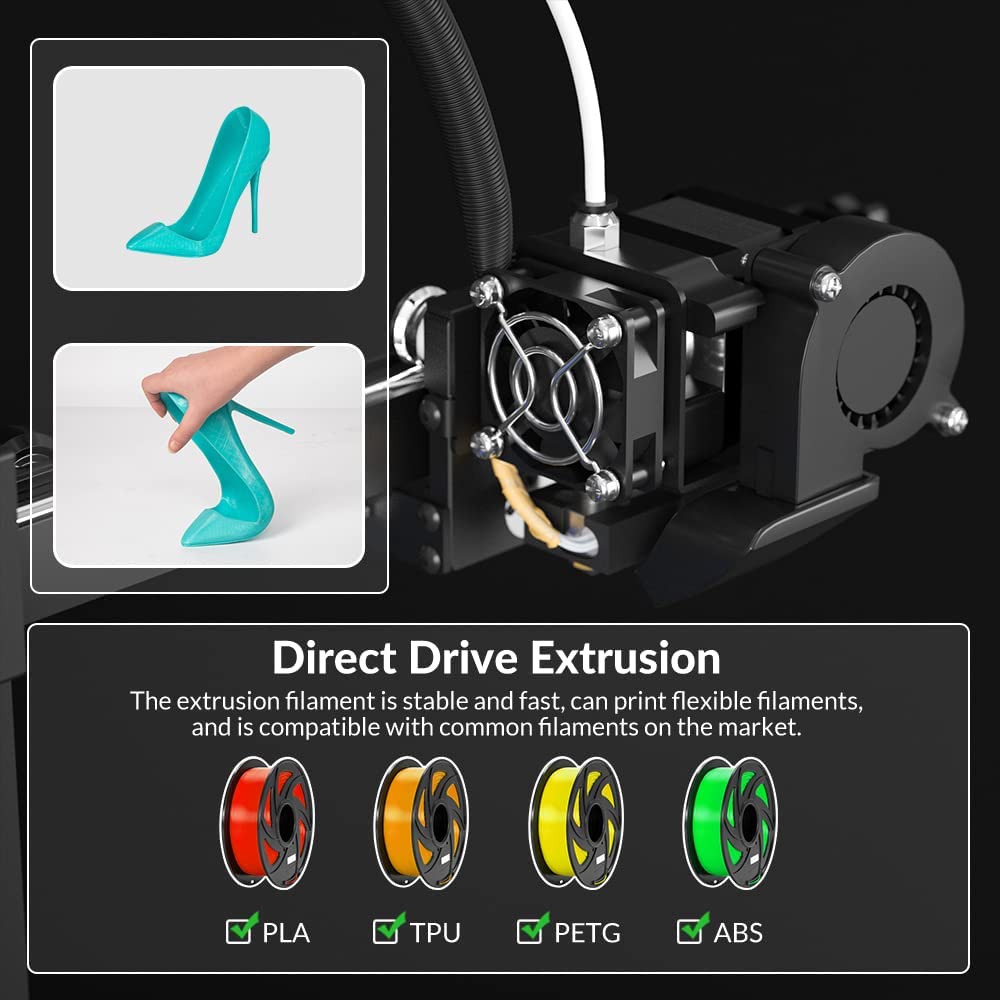
You would think with a direct-drive extruder, feeding filament into the hot end would be a breeze. Well, think again. Users reported having difficulty getting the filament in, even with the tube removed. It appears the benefit of increased accuracy and compatibility with a variety of filaments doesn’t extend to user experience in this aspect.
The quality of the prints is pretty decent, but be prepared for some ghosting and slight wiggle. It’s likely due to vibrations from the lightweight design. However, the overall ease-of-use and compact size of the Tronxy CRUX1 3D Printer might make up for these shortcomings. The upgraded PEI sheet is a bonus, too.
All in all, this 3D printer seems decent for its price point, especially when comparing it to more expensive alternatives. It’s suitable for those who don’t mind making a few adjustments here and there, and the portability factor is a plus for kids and students. Just be aware of the potential limitations and don’t expect a completely smooth experience from the get-go.
Buy the TRONXY CRUX1 3D Printer with PEI Sheet on Amazon
Product Specifications
Printing Size
First off, let’s talk about the TRONXY CRUX1 3D Printer’s printing size. With dimensions of 7.08 x 7.08 x 7.08 inches, this printer may be small, but don’t underestimate its capabilities. It’s perfect for students, children, and anyone who wants a portable, high-quality 3D printer. So, don’t judge a printer by its size!
Supported Filament Types
When it comes to filament compatibility, the CRUX1 can handle a variety of materials that users often look for, including PLA, ABS, PETG, and TPU. Now, isn’t that just fantastic? Your creativity won’t be limited by what this printer can handle — just go wild and create as much as you want without breaking a sweat.
Printer Weight
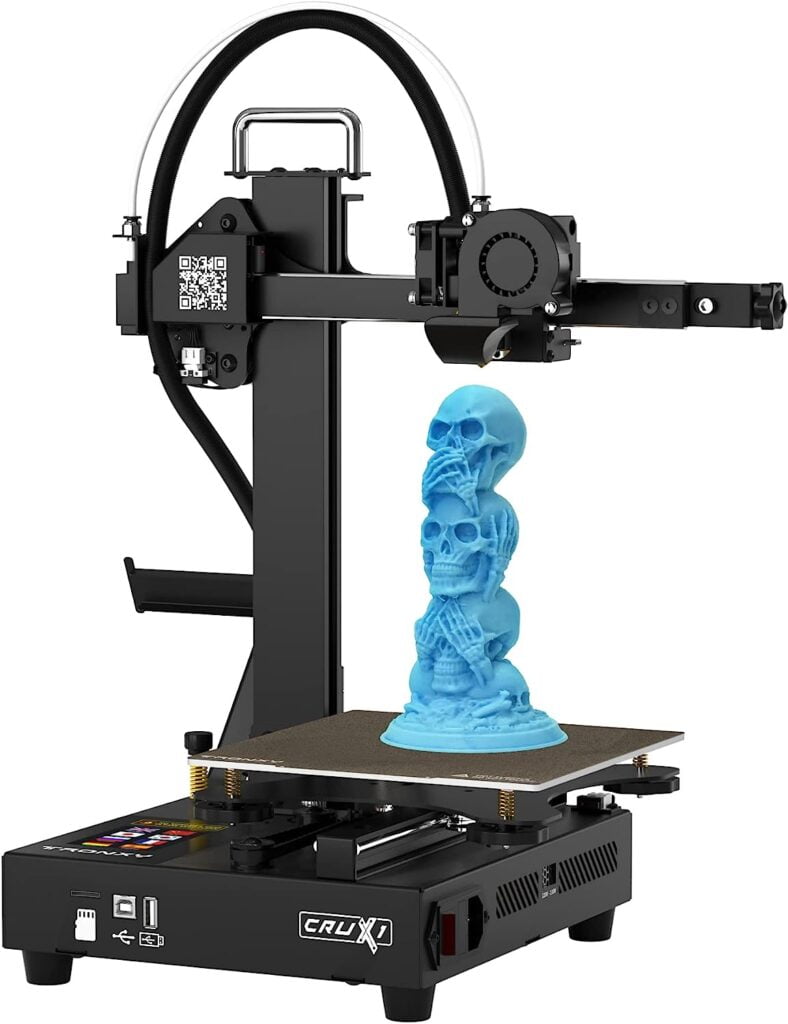
What’s the point of having a portable 3D printer if it weighs a ton? Fret not, my friend, as the TRONXY CRUX1 weighs in at under 6 kg, making it incredibly easy to move around. It’s the epitome of a lightweight, portable 3D printer.
OSG15 Guide Rail
With the Y-Axis OSG15 linear guide rail installed for smooth and speedy performance, you’d think they couldn’t possibly make this printer any better, but you’d be wrong. The TRONXY CRUX1 improves both accuracy and stability like it’s nobody’s business, owing to its high wear-resistant pulley.
Metal Pulleys
And if that wasn’t enough, the metal pulleys and adjustable belts truly show how versatile this little printer is. The X-axis belt adjustment knob makes it a breeze to adjust the belt’s tightness, reducing the appearance of printing layers and improving overall print quality.
So there you have it, folks. The TRONXY CRUX1 3D Printer may have caught your eye because of its price, but it’s so much more than just an affordable option. Its quality and performance genuinely rivals its more expensive competitors, and it’s an excellent choice for those just starting their 3D printing journey.
But fair warning — always give the printer a thorough inspection once it arrives. Issues with quality control from the factory can be a real pain, but fixing them isn’t too difficult. Once you’ve tightened any loose screws, this little machine is ready to prove itself. And who knows? With its features and performance, this affordable and portable printer might even earn a much-deserved permanent spot in your lineup.
Unboxing and Assembly
What’s Included in the Box
Upon receiving the TRONXY CRUX1 3D Printer, a user would initially notice its simple packaging. After getting past the cardboard, one would find the semi-assembled 3D printer parts, power cable, included PLA filament, and handy documentation, which will make the process of assembling this machine a manageable ordeal. The handle, linear rods, and other hardware components are also present, contributing to the solid and sturdy build of this machine.
Required Tools
Thankfully, assembling the TRONXY CRUX1 3D Printer doesn’t require an engineer’s toolkit, but a few tools are necessary to streamline the process. First, a hex key is required for tightening screws and a screwdriver to properly mount components. Additionally, a small wrench or a pair of pliers can come in handy when dealing with tightening nuts and bolts.
Time Required for Assembly
Efficiency is what the TRONXY CRUX1 3D Printer is all about, and its assembly process is no exception. With about 95% of the printer pre-installed, assembling this machine is a relative breeze. Nevertheless, it would be prudent to have a couple of hours set aside to ensure a smooth and successful assembly experience.
Assembly Instructions
While putting this anger-inducing device together may not be a walk in the park for everyone, the included assembly instructions definitely help get the job done. However, before diving into the nuts and bolts of this 3D printer, it is essential to scrutinize the provided documentation and become familiar with the details.
It’s worth noting that quality control from the factory could be better, so it’s advisable to double-check and tighten any loose screws on the extruder, bed, and other parts before proceeding. Additionally, users should verify that the belts for the X and Y axes are secure and properly adjusted. It’s also a good idea to test the handle and linear rods (and tighten them up if needed) to make sure they are firmly in place.
Once everything is up and running, leveling the bed should not be a daunting task. If needed, adjustments can be made during the print using the “Adjust Z” option available on the touchscreen. Users should also be mindful of the need to load filament correctly despite being somewhat inconveniently designed.
So, Who Should Buy the TRONXY CRUX1 3D Printer?
When looking for an entry-level and affordable 3D printer, the TRONXY CRUX1 might seem like a risky investment. However, those who are willing to give this printer a chance and look beyond its obvious flaws will likely find that the TRONXY CRUX1 is a more than satisfactory machine for the price. The output quality, reasonable print speed, and compatibility with various filaments make it an enticing option for those just entering the exciting world of 3D printing. Just don’t expect it to be perfect — after all, you get what you pay for!
Get your hands on the TRONXY CRUX1 3D Printer
Initial Printer Setup
Don’t let the budget price of the TRONXY CRUX1 3D Printer deceive you, as it packs quite a punch with its unique design and high-quality prints. However, brace yourself – it does come with a few challenges that might put a damper on your mood. Nevertheless, once you’ve conquered the initial hurdles, you’re in for a heck of a ride with this small but mighty printer.
Powering On the Printer
It all starts with connecting the PSU to the main board only to find out that the stinking connectors are just bare wires! Cheap kits on Amazon could rescue this issue, but come on! Let’s get this show on the road – turn on the printer, fire it up, and hope it doesn’t decide to give us a headache.
Leveling the Bed
Did someone forget to tighten the screws before shipping out the printer? Expect nothing but failure if you don’t double-check and tighten the loose screws that somehow passed the factory’s so-called quality control. Leveling the bed can be a pain in the neck, with the head burying itself into the bed. Good luck sleeping at night and getting this printer on track for your projects!
Loading Filament
Oh, joy – another conundrum. Loading the filament into the direct-drive extruder is a tedious chore, akin to threading a minuscule eye of a needle blindfolded. Why couldn’t they design an easier method rather than leaving us to twist, turn, and fumble our way around? At least the extruder is made with all-metal gears, giving it extra durability and precision.
Testing and Calibration
When everything is finally set up properly – after triple-checking it’s not about to go haywire on us – this nimble printer churns out prints comparable to its big-name cousins. It takes a bit of dedication and patience to adjust the settings, and getting the nozzle closer or further away during the printing process can be finicky. That being said, we must admit that this TRONXY CRUX1 printer is a worthy competitor.
In the end, it’s worth the hassle if you’re looking for a budget printer that can deliver on quality, speed, and performance. It’s perfect if you want to start small and work your way up from there. No pain, no gain! Give this little underdog a chance and watch it defy expectations once the initial problems have been dealt with! So, roll up your sleeves, embrace the challenge, and dive into the world of 3D printing, courtesy of the TRONXY CRUX1 3D Printer!
Printing with the TRONXY CRUX1
Slicing Software Recommendations
For heaven’s sake, don’t come complaining about this 3D printer if you can’t even grasp the basics of slicing software. Before diving into the world of 3D printing, educate yourself on how to use software like Cura, PrusaSlicer, or Ultimaker. If you’re not willing to learn, then don’t whine when everything goes haywire.
Recommended Print Settings
Considering this printer’s cost, the print quality is nothing short of amazing. Some simple recommendations for a smooth experience include printing with 0.2mm layer heights and using a 60mm/s printing speed. Most importantly, tighten those pesky belts before the first print; better be safe than sorry.
Print Quality
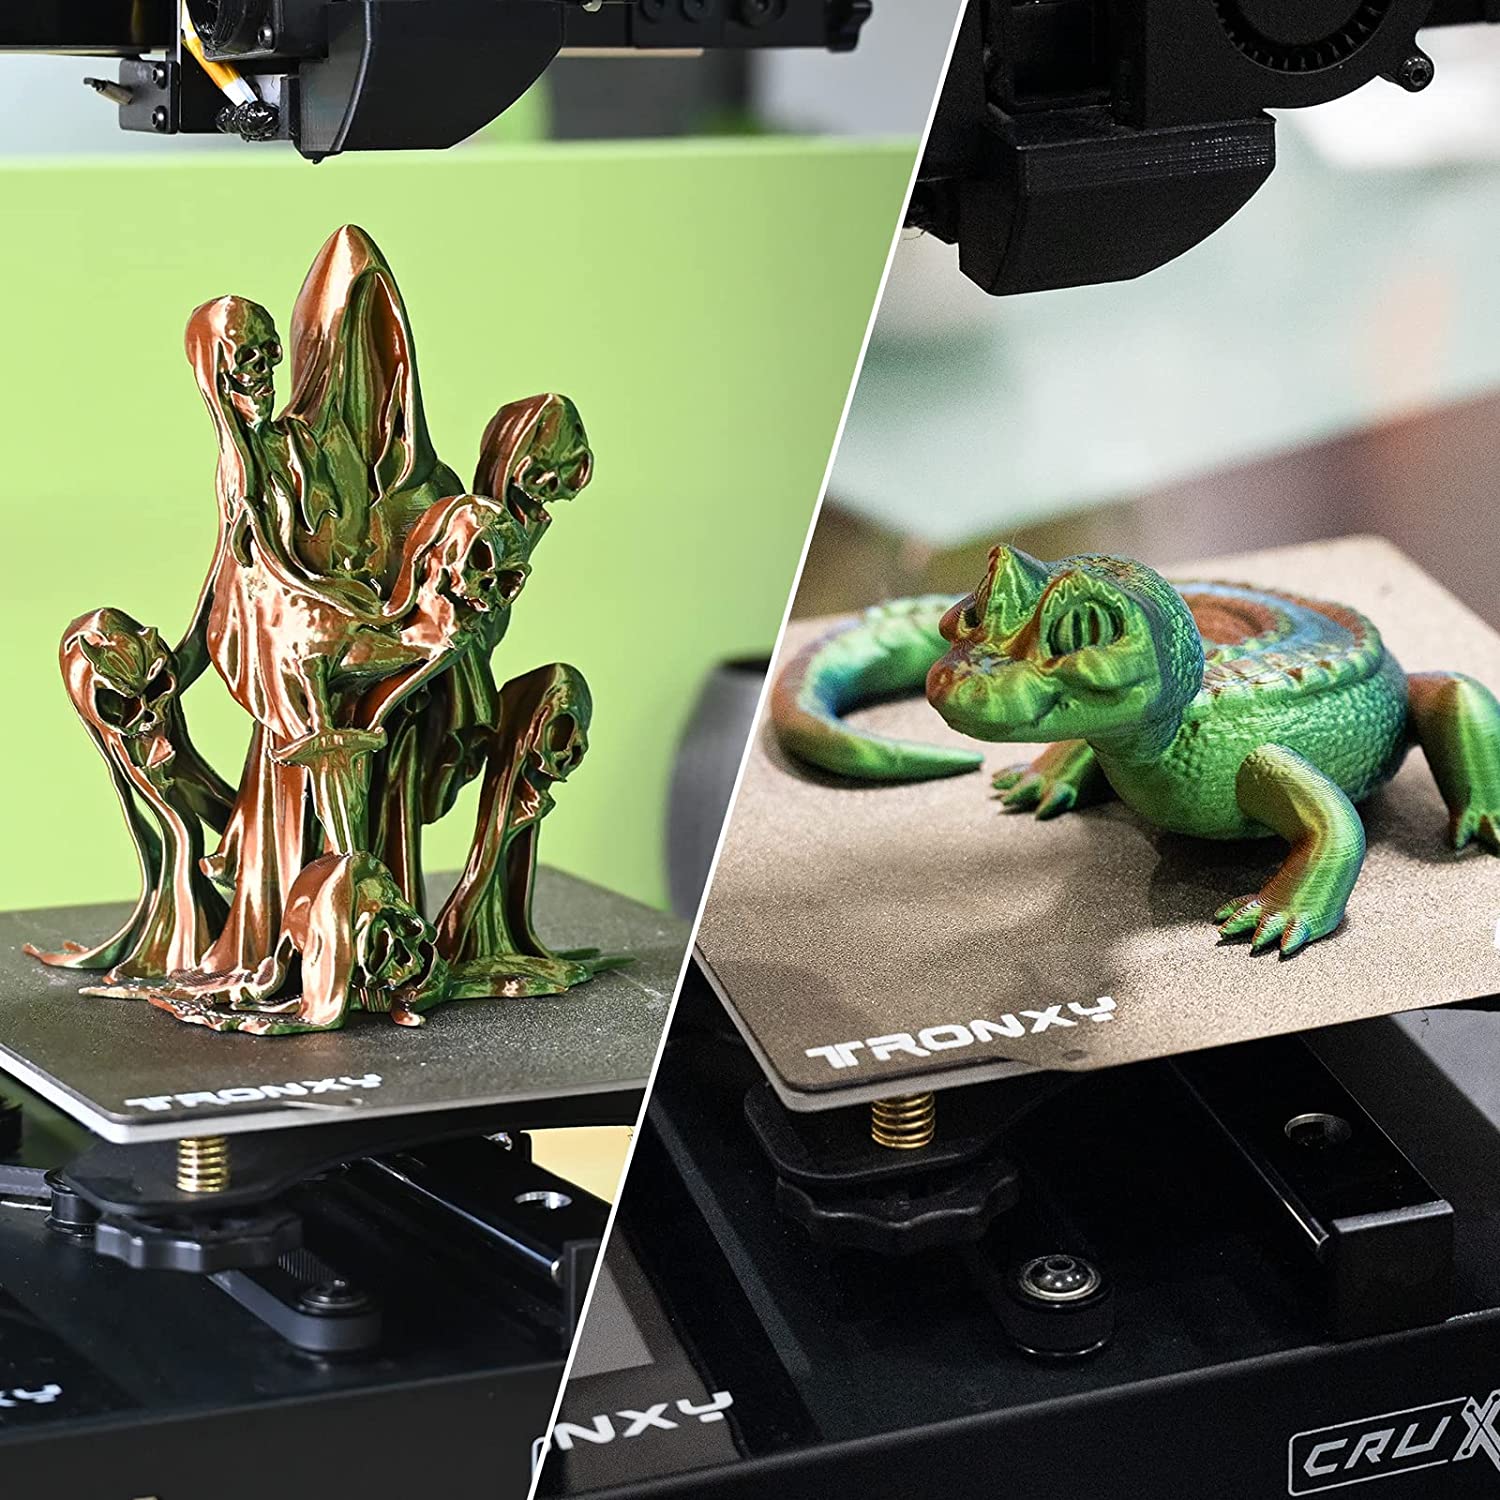
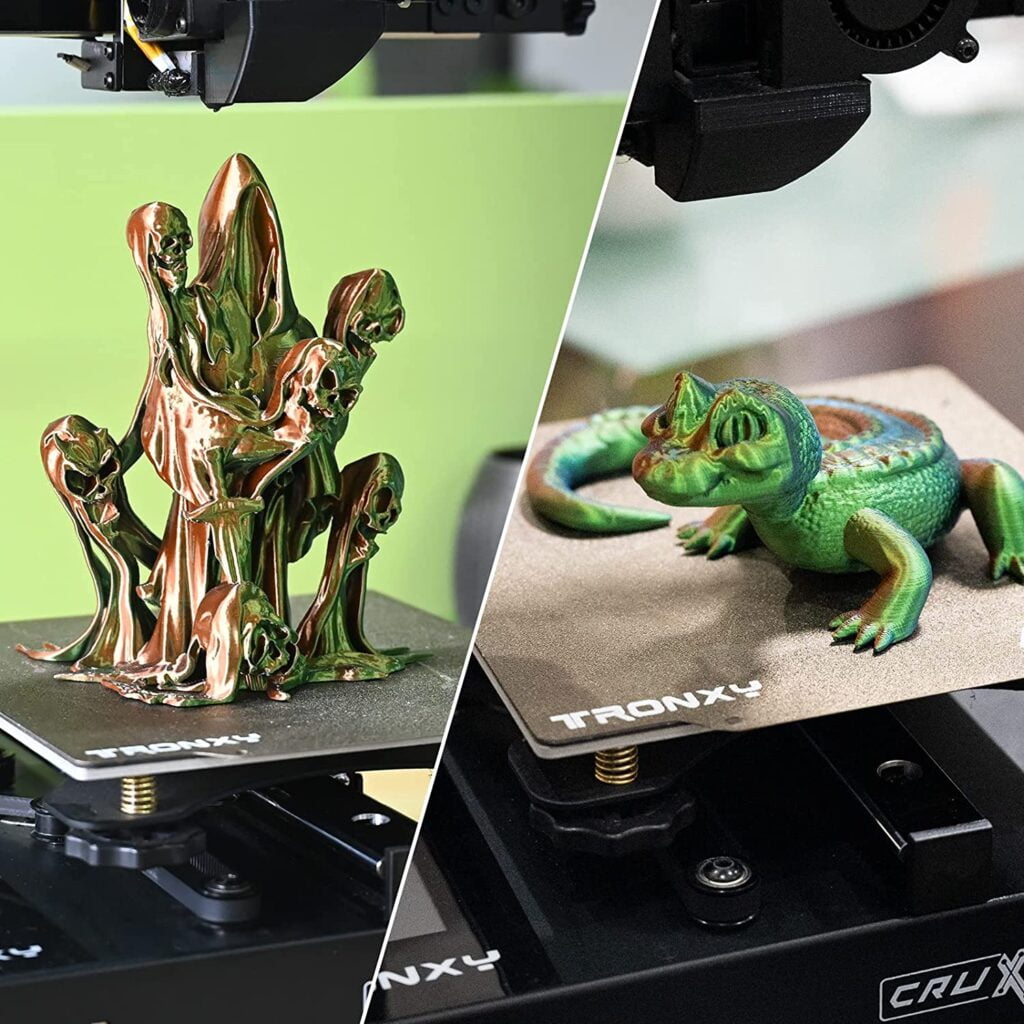
This printer doesn’t disappoint when it comes to quality. Frankly, the TRONXY CRUX1 prints like a champ, rivaling even the Prusa Mini. Sure, there might be a bit of ghosting or a slight shake, but that’s peanuts compared to the trouble other printers can give. As long as you know what you’re doing, this printer is a steal.
Tips for Successful Prints
Here are some tips to get the most out of this little beast:
- Assembly: Don’t be an impatient dolt when assembling the printer. Check and double-check every bolt and screw, tighten the belts, and make sure every part is secured properly. It only takes a few minutes, and it can save you from a frustrating experience later on.
- Leveling: Leveling the platform is a piece of cake with this printer. However, if you need to adjust the nozzle distance after leveling, don’t fret! There’s a handy screw located by the Z-axis sensor specifically for that purpose.
- Filament Feeding: Feeding the filament into this printer can be a pain in the neck, but with a bit of twisting and maneuvering, it’ll slide right in. Just be patient with it.
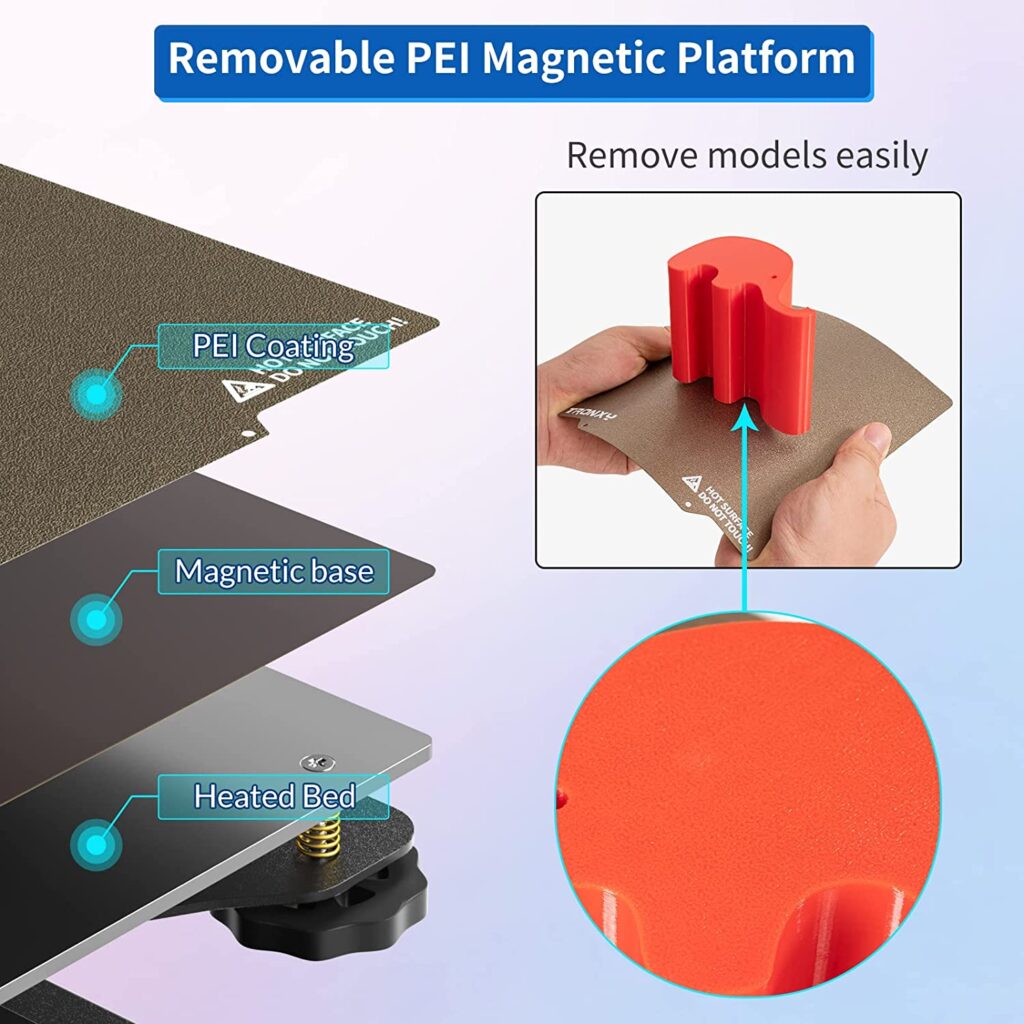
- PEI Sheet: Lastly, this printer has an upgraded PEI sheet that genuinely outshines other printers in this price range. Don’t waste your time with blue tape or hairspray; the TRONXY CRUX1 has got you covered.
So, there you have it. The TRONXY CRUX1 is far from perfect, but it boasts impressive quality and capabilities for its price. If you’re strapped for cash but still want to delve into the fascinating world of 3D printing, this angry little printer could be what you’re looking for – just make sure to do your research and have patience.
Get your TRONXY CRUX1 High Precision 3D Printer here
Maintaining Your TRONXY CRUX1
Proper maintenance of the TRONXY CRUX1 3D printer is essential for its longevity and optimal performance. Here are some helpful tips and tricks to ensure you get the most out of this affordable yet high-quality 3D printer.
Cleaning the Extruder
A well-functioning extruder is crucial for successful 3D prints. Clogged extruders can lead to jams, poor print quality, and wasted filament. To keep the direct-drive extruder on the TRONXY CRUX1 operating smoothly, periodically clean it by removing excess filament and debris. Thankfully, the all-metal gears of the extruder are sturdy and should hold up well over time. Remember, a clean extruder means more accurate and consistent prints!
Replacing the PEI Sheet
The upgraded PEI sheet on the CRUX1 has been praised for its ability to produce clean prints. However, over time, the PEI sheet may wear out or become damaged. Fortunately, replacing the sheet is a simple process. Just peel off the old sheet, clean the build plate, and apply a new PEI sheet. Voila! Your printer is ready to create impressive prints once more.
Tightening Belts
Loose belts on the X and Y axes can cause wobbling, ghosting, and other imperfections in your prints. To avoid these issues, keep an eye on the tension of the belts and adjust them as needed. The CRUX1 has a handy belt adjustment knob on the X-axis, making it simple to achieve the right tension. For the Y-axis, just loosen the three bolts and pull the motor out to tighten it. Properly tightened belts mean greater stability and improved print quality.
Updating Firmware
To ensure your TRONXY CRUX1 stays up-to-date and performs at its best, keep an eye out for firmware updates from the manufacturer. Updated firmware may improve print quality, fix bugs, or add new features—making it worthwhile to stay current.
Even though the TRONXY CRUX1 may not be perfect, it’s a remarkable 3D printer considering its price point. By following these maintenance tips, you can make sure you get the most out of this portable, lightweight, high-precision mini 3D printer. So go ahead and invest in the CRUX1—with some care and attention, you’ll soon be churning out impressive prints with ease.
Addressing Common Issues
In this section, we’ll go through some common complaints and issues faced by users of the TRONXY CRUX1 3D Printer. Many of these complaints seem to stem from a lack of understanding or improper assembly, rather than the actual printer itself. We’ll discuss what can be done to fix these problems, and perhaps show you that this 3D printer might just be worth the purchase after all.
Filament Loading Difficulties
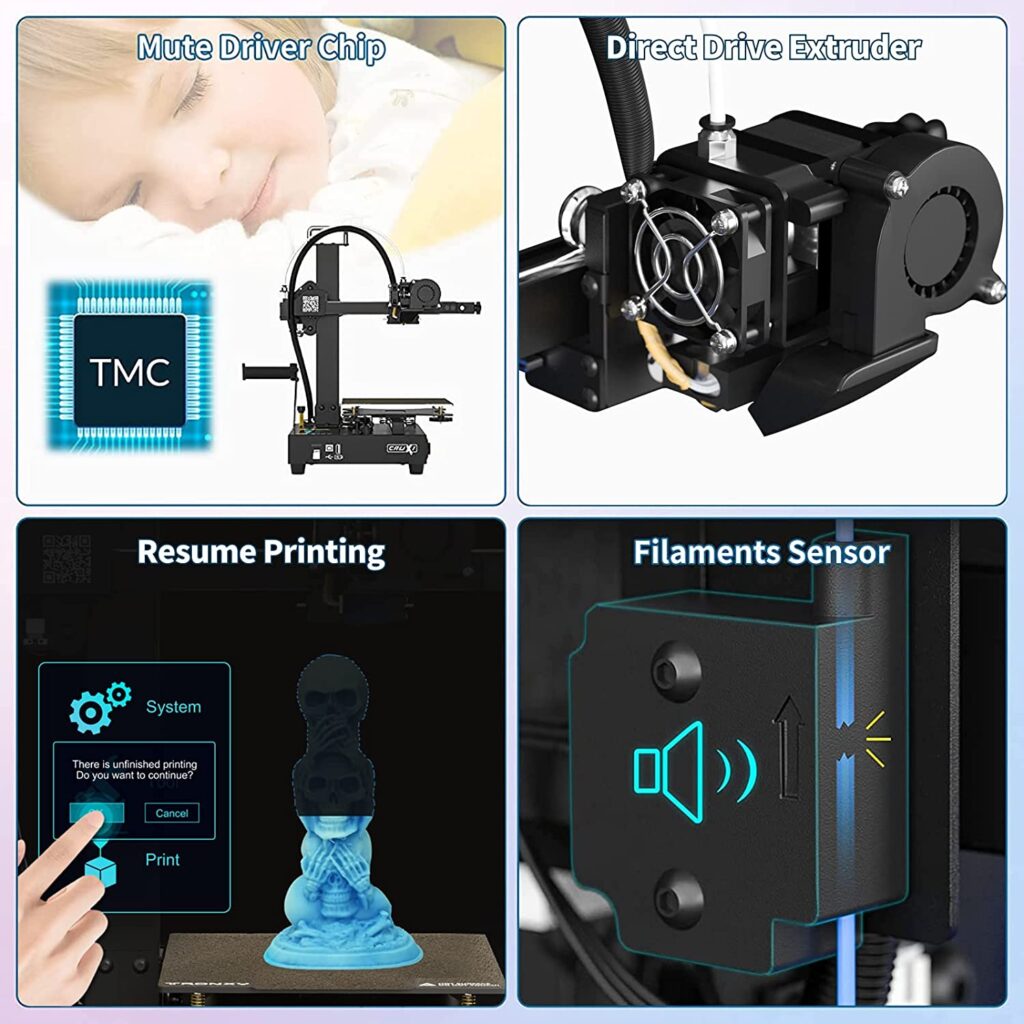
Some users have mentioned difficulty in loading filament into the extruder, describing it like “a bowden masquerading as a direct drive.” However, this issue seems to resolve itself after some practice. The Direct-Drive Extruder ensures fast and stable extrusion filament and accurate retraction, so once you’ve mastered loading the filament, you’re in for a smooth ride.
Ghosting and Wiggle
One reviewer discovered that their printer head was causing ghosting and wiggle behavior. Instead of throwing the whole printer out, this issue could be resolved by checking for loose screws and re-tightening everything to ensure stability. In fact, that’s what the user did, and they reported a massive improvement in print quality.
Belt Adjustments
The X-axis belt adjustment knob on the TRONXY CRUX1 3D Printer makes it easy to adjust the tightness of the belt, reducing the appearance of printing layers. While it might be a bit confusing at first, learning how to utilize this feature can significantly improve your print quality. So don’t let initial confusion hold you back; give it some time and adjustment, and it’ll impress you for sure.
Loose Screws
Several users have reported finding loose screws on their TRONXY CRUX1 3D Printer after unboxing. Though this might be due to lackluster quality control from the factory, it’s important to note that this issue is entirely fixable. Simply double-check all of the screws upon receiving your printer and tighten any loose ones. From then on, you can rely on this budget-friendly printer to produce fantastic results, rivaling even more expensive machines like the Prusa Mini.
Recommendation for a Specific Audience
To round things off with a shiny red ribbon, the TRONXY CRUX1 3D Printer with PEI Sheet is an excellent option for those new to 3D printing or anyone looking to add a portable, budget-friendly printer to their collection. With features like the Direct Drive Extruder, Double OSG15 Guide Rail, and Lightweight Cantilever Structure, this printer packs a punch way above its price point.
Just remember to double-check all screws and components, practice loading filament into the extruder, and play around with the belt adjustment knob to fine-tune your print quality. This 3D printer ain’t for the faint of heart, but once you’ve figured out what makes it tick, you’ll have an incredible piece of equipment on your hands.
Potential Modifications
As one angry reviewer put it, if you don’t understand how a 3D printer works, don’t complain about how “complicated” it is. But for those who do know a thing or two, there are some potential modifications that can be made to the TRONXY CRUX1 3D Printer. We’ll cover them so you can get the most bang for your buck and discover just how truly fantastic this printer can be.
Upgrading the PSU Connectors
It’s infuriating when you spend your hard-earned money on a gadget that’s supposed to make life easier only to discover that certain components aren’t up to par. The PSU connectors are one such aspect that could use a little improvement. Some users have reported that the connectors would heat up significantly during longer print sessions. Swapping the stock connectors for higher-quality alternatives could add an extra layer of protection and get rid of that potentially dangerous problem.
Moving the Spool and Run Out Sensor
It’s quite absurd that the spool and run out sensor are positioned at the back of the printer, making it a little difficult to access. However, there’s no need to throw a fit; with a bit of DIY ingenuity, you can relocate them both to the sides of the printer where they’re more accessible. This will save you the trouble of awkward overreaching and make it easier to enjoy the process of 3D printing.
Extruder Design Improvements
Alright, let’s talk about the elephant in the room – the extruder. While the all-metal gears have been praised by users, many have also expressed frustration over the difficulties faced while trying to feed the filament into the hot end. This darned issue could be remedied by redesigning the extruder for easier filament loading. By modifying the extruder design, you’ll eliminate the need for all that twisting and turning, leaving you with a far smoother experience.
Sure, the TRONXY CRUX1 3D Printer may have a few minor shortcomings, but for the price, this little machine packs a punch and delivers quality prints. It may no be perfect, but with a few tweaks and modifications, you can make it a force to be reckoned with. So instead of griping about the quirks, put your DIY skills to work and turn this mini beast into the smooth-operating, efficient printer it’s meant to be.
TRONXY CRUX1 3D Printer with PEI Sheet Review
What a disaster! Yet, here we are, trying to bring an angry perspective on this infuriating little contraption. The TRONXY CRUX1 3D printer claims to be a portable, easy-to-assemble, and affordable piece of hardware geared towards beginners and hobbyists. Let’s tear it apart and see if it even holds up to its claims, shall we?
Design and Build Quality
First off, this thing is tiny! It’s petite design and convenient handle make it easy to move around, but at what cost? The reduced build volume (7.08×7.08×7.08 inches) might limit your creativity somewhat, but some users think the small footprint is good for beginners. You’ll have to decide for yourself if size matters.
The cantilever structure might seem like a terrible idea at first but it appears to strike a nice balance between force, load capacity, and stability during printing. Somebody somewhere saved a few screws with this design. With its lightweight frame, this critter comes in at under 6 kg, perfect for kids and students to lug around.
Functionality and Key Features
This annoyingly well-designed printer features Direct Drive Extruder, Double OSG15 Guide Rail, and Metal Pulleys Adjustable Belts. Despite its size, it manages to perform well and be relatively stable throughout the printing process. The Direct Drive Extruder ensures fast and precise retraction, while the OSG15 linear guide rail and high wear-resistant pulley provide smooth movements to up the accuracy and stability – infuriatingly enough.
Tips for a Better Experience
- Check out filament modifications online to minimize resistance and improve print quality.
- Tighten the belts before use to avoid loose parts and wobble.
- Adjust the z-axis to improve bed leveling and print quality.
- Lubricate the moving parts to help reduce noise and potential vibrations.
A Few Drawbacks
Don’t think we were gonna let this one slide without picking on its flaws. For starters, the wiring from the PSU to the main board leaves much to be desired. Bare wires everywhere – talk about cut corners! Also, you’ll definitely want to replace the included filament with something of higher quality to see better results – but then again, what’d you expect from a $170 3D printer?
Filaments for the TRONXY CRUX1
Supported Filament Types
It’s important to note that this 3D printer is compatible with common filaments like PLA, ABS, PETG, and TPU. However, it’s difficult to feed the filament through the hot end due to the awkward positioning of the filament sensor and spool. You’ve been warned.
Recommended Brands
We’d recommend sticking to well-known brands for your filaments. Some options include Hatchbox, eSun, and MatterHackers. These brands have a proven record of providing quality filaments that will improve your overall printing experience – which is bound to fuel your anger just a little bit more.
Troubleshooting Filament Issues
If you run into any issues like clogged nozzles or poor adhesion, consult the user manual and online forums. Many users have faced and overcome similar problems, and sharing your rage with them might help ease the pain of troubleshooting.
So there you have it. As much as it pains us to admit it, the TRONXY CRUX1 3D Printer might be a decent choice for those dipping their toes into the world of 3D printing. It’s got a few quirks, but it’s hard to argue with the results on a printer so affordable. What a bother.
Comparing the TRONXY CRUX1 to Other 3D Printers
TRONXY CRUX1 vs. Ender 3 Pro
When it comes to pitting the TRONXY CRUX1 against the Ender 3 Pro, one can’t help but be impressed by the build quality and features offered by the CRUX1 at such an affordable price. Despite some initial quality control issues and the need for some minor fixes, once these issues are addressed, you’ve got yourself an outstanding 3D printer that offers great print quality, especially when compared to the more expensive Ender 3 Pro.
One thing you either love or hate is the cantilever design, which makes the CRUX1 lightweight and portable. Some may argue that the Ender 3 Pro has a more rigid structure, but the CRUX1 proves that it’s more than capable of producing excellent prints while maintaining stability during printing.
TRONXY CRUX1 vs. Prusa Mini
Now, let’s compare the CRUX1 with the Prusa Mini. Reviewers have mentioned that the print quality of the CRUX1 is nearly on par with the Prusa Mini. That’s quite a feat, considering the much-lower price tag of the CRUX1. Of course, the Prusa Mini has its own reputation for producing high-quality prints, but if you’re on a budget and aren’t too concerned about the bells and whistles of a more expensive machine, then the CRUX1 is definitely worth a look.
One valid concern with the CRUX1 is its filament loading system, which is slightly cumbersome when compared to the Prusa Mini. However, with practice and patience, it’s manageable.
Advantages of the TRONXY CRUX1
Where the CRUX1 truly shines is its ability to print with a variety of materials, even the notoriously difficult TPU. It handles different filaments with ease, including PLA, ABS, PETG, and TPU, making it an extremely versatile and adaptable machine.
The Direct Drive Extruder with all-metal gears provides stability and fast extrusion filaments, resulting in accurate and precise retraction. Additionally, the usage of linear guide rails and adjustable belts ensures smooth movement and reduced layering in prints, giving you high-quality prints at a fraction of the cost of other 3D printers.
Another great feature mentioned by users is the CRUX1’s auto-resume capability which allows you to restart where you left off after a power outage or accidental shutdown. Yeah, that’s right; this cheap but solid printer can handle interruptions like a champ!
So, if you’re a beginner looking into the world of 3D printing and don’t want to burn a hole in your wallet, the TRONXY CRUX1 is a fantastic starting point. And while it may not be perfect and require some tinkering and adjusting, it packs a punch for the low price. Just don’t forget to tighten those screws!
Recommendations for First-Time Users
When it comes to the TRONXY CRUX1 3D Printer, it’s essential not to judge a book by its cover, or, well, its price range. Many users seem to have this fantastic piece of machinery in their homes or offices, and almost all of them report that it prints superbly. Sure, it may not come prepared and assembled like they expect – but hey, what can you expect from a budget printer like this? Don’t let a few minor issues stop you from joining the club! Here are some tips to help you get started on your 3D printing journey with confidence.
Understanding Slicing Software
Before you start throwing your hands in the air and cursing this printer because it appears to be “complicated,” take a step back. The issue might not lie with the hardware itself, but the software. To make the most out of your 3D printer, a proper understanding of slicing software is essential. Don’t start a printing job without doing your due diligence, mate! Several 3D slicer software options are available online, either free or paid. Read up on how to prepare your 3D models and set the parameters correctly before sending it off to the printer.
Researching 3D Printing Basics
A bit of research never hurt anyone – and when it comes to 3D printing, it could be the key to unlocking the full potential of your TRONXY CRUX1. Sure, this printer is marketed as a beginner-friendly model, but that doesn’t mean you shouldn’t spend some time learning the ropes. Spend time grasping essential concepts such as leveling the printer, adjusting belts, and tightening screws. Trust us, it’ll pay off in the form of beautiful, accurate prints. And seriously, let’s not blame the poor printer when it’s likely user error, alright?
Common Mistakes to Avoid
Watch out for some common mistakes that newbies tend to make. For starters, keep an eye out for loose screws and belts. Users have reported needing to tighten things up upon receipt. Thankfully, you can easily avoid other users’ pain points and frustration by double-checking all components before you print.
Another potential headache is the direct drive extruder, which can be a pain when loading filament. However, once you get the hang of it, it seems to work like a charm for printing various materials like PLA, PLA+, PETG, and TPU. Just be patient, experiment and maybe mumble a few choice words, but don’t blame the printer for user difficulties!
So there you have it – the TRONXY CRUX1 3D Printer might have its quirks, but if you know what you’re doing, it’s a heck of a tool to have. Just remember: learning is part of the process, and it might take time before you become a 3D printing pro. But in the end, you’ll be flipping impressed by what this bad boy can do.
User Experiences with the TRONXY CRUX1
Positive Reviews
Many users have found the TRONXY CRUX1 3D Printer to be a fantastic addition to their collection, thanks to its compact size, easy assembly, and budget-friendly cost. For people who have had experience with other 3D printers, such as the Ender 3 Pro, this little machine has proven to be an excellent alternative – allowing for almost uninterrupted printing, day and night. Users also appreciate the printer’s capability to handle TPU and other Flex materials, resulting in clean prints and good quality outcomes, including “tires” that are remarkably squishy and lifelike.
Moreover, when comparing it with more expensive printers like the Prusa Mini, some users claim that the print quality is on par, making this a low-cost contender in the market. The TRONXY CRUX1 3D Printer has also been praised for its small size and backpack-esque handle, making it portable and perfect for students and small-business owners.
Negative Reviews
Despite the numerous glowing reviews, there have been some complaints regarding the printer’s quality control from the factory. These concerns include loose screws and poorly installed extruder parts, leading to failed prints and frustrating troubleshooting experiences. However, after tightening the loose screws and properly installing the heat block and extruder, users have been able to successfully operate the printer without issues. While this certainly isn’t ideal and the manufacturer could improve their initial quality control, it does seem that with a little extra care and attention, customers can greatly improve the printer’s performance.
Addressing Quality Control Concerns
It’s undeniable that the TRONXY CRUX1 3D Printer has great potential, but it’s equally important to acknowledge its shortcomings as well. The good news for prospective buyers is that the majority of the reported issues seem to stem from quality control at the factory level and can be remedied with some manual intervention. If you’re willing to put in a bit of extra effort to check and adjust the components on arrival, this printer can deliver impressive results – especially considering its budget-friendly price tag.
Buyers who are new to 3D printing should also be aware that the learning curve might be steeper than expected. While some negative reviews can be attributed to a lack of understanding about the intricacies of 3D printing, it’s still essential to do your research before committing to this purchase. Familiarizing yourself with slicing software and gaining a basic understanding of how 3D printers work will go a long way in setting realistic expectations and avoiding disappointment.
At the end of the day, if you’re looking for a portable, affordable, and high-quality 3D printer with some quirks, the TRONXY CRUX1 3D Printer might be the right fit for you. Once the initial hiccups are sorted out and the printer is set up correctly, this little machine has the potential to deliver impressive results that defy its modest price point.
Frequently Asked Questions
What are the primary differences between the TRONXY CRUX1 and other 3D printers?
Let me tell you right now, for the price, you’re not gonna find anything better than the TRONXY CRUX1. It’s got that cantilever structure, making it lightweight and efficient. And instead of those flimsy rubber wheels, this little beast sports some high-quality OSG15 guide rails on the Y-axis and metal pulleys on all axes. Yeah, that’s right – it’s got the build quality to rival even the big boys like Prusa Mini. Say goodbye to belt slack, ’cause you can adjust it all with a simple knob. Don’t even get me started on the Direct Drive Extruder for fast and accurate filament extrusion.
Is the TRONXY CRUX1 suitable for beginners?
You bet your bip it is! This puppy comes 95% pre-installed, so you’ll just need to handle a few quick assembly steps. And it’s craaazy lightweight, at just under 6 kg. It’s honestly perfect for students, kids, or anyone looking to dip their toes into the 3D printing world. Trust me, the learning curve won’t be as steep as you think.
How do I address issues with the included filament?
Oh, come on, don’t shoot the messenger here. Look, we all know that sometimes, the included filament can be a bit finicky. If you’re having trouble feeding it into the hot end, twist it and move it around until it slides in nicely. And if that’s not cutting it for you, don’t worry – the TRONXY CRUX1 is compatible with a whole bunch of common filaments like PLA, ABS, PETG, and TPU. So just pick your poison and start printing.
What is the maximum print size for the TRONXY CRUX1?
Sure, it’s not going to spit out massive prints, but the TRONXY CRUX1 still gets the job done. It’s got a respectable printing size of 7.08×7.08×7.08 inches. C’mon, it’s a mini 3D printer, after all. But, for most basic prints and small projects, that size is more than enough to be useful.
Can I use third-party modifications with the TRONXY CRUX1?
Hold your horses there, partner. The TRONXY CRUX1 already packs quite a punch for its price. But hey, we get it – you want to soup it up a bit. Well, you’re in luck! This baby is open to a whole host of upgrades. Seriously, some users even printed the upgrades themselves! Just make sure you know what you’re doing before you jump into modding your printer. Safety first, kids. And happy printing!
Amazon and the Amazon logo are trademarks of Amazon.com, Inc, or its affiliates.

